




Foil vs. Semi-Rigid Dryer Vent Hose: Which Holds Up?
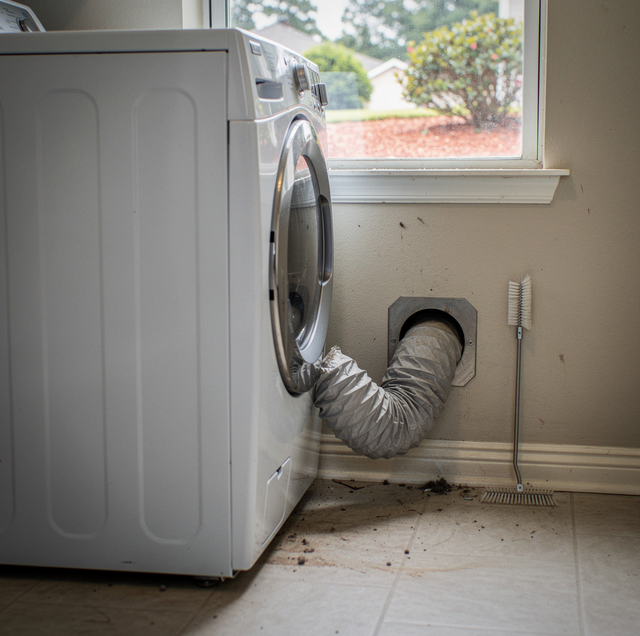
When clothes come out of the dryer still damp, or a cycle that used to finish in under an hour now needs a second run, the machine itself looks like the obvious suspect: a weak heating element, a worn motor, a clogged lint screen. The cause can also sit in a part that rarely gets looked at: the short length of flexible hose connecting the back of the dryer to the wall or floor vent. That hose is inspected, shortened, or replaced on every vent visit, because a dryer can have a new heating element and a clean lint trap and still run two cycles to dry one load if the hose carrying exhaust air out of the structure is crushed, sagging, or looped on itself behind the machine.
The table below compares the two materials sold for that short connection.
| Hose Material | Shape Under Pressure | Lint Catch Points Along the Run | What Happens Over Time |
|---|---|---|---|
| Foil (ribbed, wire-helix) | Crushes flat where it gets pinned; sags between fixed points | A shallow ledge at every rib | Loses its round shape at crush points and does not spring back |
| Semi-rigid (telescoping aluminum) | Holds a round shape on its own, without the wire | Fewer, shallower ribs along the same length | Keeps its line for the working life of the connection |
What the Transition Hose Does
The transition hose is the only flexible section in the whole vent path. From the dryer's rear exhaust port, it carries hot, moist air loaded with lint a short distance to a wall or floor vent stub, where the rest of the run takes over: a fixed length of round metal duct inside the wall or floor cavity, ending at an exterior hood with a flapper that keeps outside air and pests from coming back in. Everything downstream of that stub is meant to be rigid and fixed in place. Only the few feet behind the machine is meant to flex, because the dryer itself gets pulled out and pushed back for cleaning and service, and the hose has to take that movement without tearing or coming loose at either end.
How Foil Duct Fails Behind a Dryer
Foil duct is a thin sheet of aluminum wound into a continuous spiral rib around a wire helix, which is what lets it stretch like an accordion to whatever length is needed. That same construction is its weak point. Each rib forms a small ledge on the inside of the tube, so lint collects along the entire length instead of blowing straight through to the outside. Because the material is so light, a section pinned between the dryer cabinet and the wall can be crushed flat the moment the machine is pushed back into place, and a crushed section drops the open area at that one point sharply, which restricts airflow for the whole run even though the rest of the hose looks fine. Between fixed points, nothing but the wire holds the tube's shape, so a length that is a little too long for the gap will sag into a belly rather than stay straight, and that low point becomes a second place where lint and the occasional bit of condensation settle instead of moving on with the airflow.
Each time the dryer comes out, run a hand along the hose. A flat spot that stays flat after you let go has creased; replace that length because a creased section will fold again along the same line.
Why Semi-Rigid Duct Holds Its Line
Semi-rigid duct, sometimes sold as slide-together aluminum duct, is a heavier-gauge aluminum tube corrugated just enough to telescope: short sections slide into one another so the overall length can be set on site, but between those sliding joints the tube holds its round cross-section on its own, with no wire doing the work. Holds its shape: because the tube supports itself, it does not collapse if it gets pinned against the wall when the dryer is pushed back, and it does not sag into a low belly between two fixed points the way foil duct does. The ribbing is also shallower than foil duct's, so fewer small ledges line the inside for lint to catch on during the trip out.
Length and Bends: Why Shorter Beats Longer
Every foot of hose and every bend the air has to turn through adds resistance the dryer's blower has to work against. A hose that runs straight from the exhaust port to a nearby wall vent gives the blower almost nothing to fight. A hose that has to travel further, around a cabinet edge or up and over an obstacle, stacks two penalties at once: more length and more turns, and a sharp turn adds resistance roughly on par with several extra feet of straight hose. A dryer that is otherwise in good working order can still run hot and slow to dry if the hose between it and the wall carries more length and more bends than the space requires.
Routing a Shorter, Straighter Run
A dryer set close to an exterior wall, with the vent stub going straight through it, gets the easiest possible path: a short, firm length of semi-rigid duct and nothing to route around. A dryer set in the middle of the house, in a closet, or on an upper floor with no nearby exterior wall, needs the exhaust to travel further, and that longer run has to turn around framing before it reaches outside, which adds resistance at every one of those turns before the air ever leaves the structure. Some of those runs climb up through the roof instead of out a nearby wall, and any condensation in a rising run drains back toward the dryer rather than out. None of this makes a longer run unworkable by itself; a longer run that stays straight can move air better than a short run with a crushed or looped connector hose, which is why the hose material and its installation matter at least as much as how far the vent has to travel.
Sizing the Gap Before You Buy
Measure the actual distance between the exhaust port and the wall or floor stub before buying either material, with the dryer pulled out far enough to work behind it. Foil duct is sold compressed and stretched out to fit, which tempts a longer piece than the gap needs because the extra length is easy to tuck somewhere out of sight; that extra length is exactly what sags into a belly once the dryer is pushed back. Semi-rigid duct is sold in telescoping sections meant to be trimmed, so the gap is measured once and the outer section cut to match, leaving no slack to coil or fold. Buy to the gap, not to the package length: a hose cut to the measured gap, with only the slack needed to pull the dryer forward, holds a straighter line than one bought long and shortened by looping it.
Making the Connection: Clamps, Screws and Tape
The two ends of the transition hose get joined with clamps or foil-backed tape rated for the heat, not the cloth-backed tape sold for general household use, which dries out and lets go after repeated cycles of heat. Skip screws at the joints: any screw driven through the duct wall pokes into the airstream and becomes a snag point that catches lint on every cycle. At the dryer end, the clamp should sit square on the exhaust port rather than canted to one side, since a crooked clamp leaves a gap on one edge that lint works its way through before it ever reaches the open hose.
Signs the Hose Behind the Machine Needs a Look
A dryer top that is hot to the touch at the end of a cycle, a load that needs a second run to finish, a faint burning-dust smell when the cycle starts, or visible lint on the floor behind the machine are all signs worth pulling the dryer out to check. Once it is out, look at the hose itself: a flattened section where it meets the wall, a belly of slack hanging below the straight line between the two ends, or a kink where the hose doubles back on itself to reach the vent stub are all places airflow is being lost before it ever reaches outside.
Lint packed into a crushed or sagging hose sits in hot exhaust air and can ignite. If you smell scorching or find browned lint at the hose, stop using the dryer and have a technician clear the hose and vent run first.
A dryer gets blamed first because it is the part you can hear and see working, but the length of hose behind it does most of the quiet work no one checks: every rib, pinch point and spare foot of slack is friction the blower has to overcome on every single cycle. Swapping that short run for a straight, well-supported length of semi-rigid duct is a change that keeps paying off on every load the machine runs afterward. A short, straight vent is worth more to a dryer than any part that goes inside it.
Frequently Asked Questions
Only as a short, fully stretched connector that stays in view and is not crushed. The wire helix inside it can also corrode where moisture collects in a sagging section, and a corroded rib loses strength faster than the rest of the run ages, so an old length is worth checking closely.
Semi-rigid duct feels stiff enough to hold its round shape when you flex a section in your hand, and the packaging is labeled rigid or semi-rigid rather than flexible; foil duct springs back loosely and stretches like an accordion the moment you pull on it.
Coiling slack hose into a loop creates multiple low points along the run, so lint collects at each loop instead of settling at a single sag, as it would in a straight length that is simply a little too long.
Yes, within limits. It bends by hand into a gentle offset and holds it, so the dryer can come forward a short way while still connected. When the dryer has to sit tight against the wall, a flat, periscope-style metal connector designed for that gap is the other option.
The transition hose is built for the open space behind the machine only; any section that has to pass through a wall or floor cavity should be rigid, round metal duct fastened in place, not the short, flexible piece meant to be pulled free whenever the dryer is serviced.
It has no place on a dryer. Plastic softens in exhaust heat and can melt or burn, and its ribs hold lint the same way foil does, so any vinyl hose found behind a dryer gets replaced with a metal one.
Have the hose behind your dryer checked before a crushed or sagging section turns into a bigger vent problem — catching it early keeps the whole run clear. Tucker Appliance Repair serves Gardendale and Greater Birmingham. Call (205) 883-9703.